
Printed photo
Visa document support
How to take a visa photo that will be accepted
A photo that does not meet the specification is one of the most common reasons an application is returned. Choose your visa below, follow the illustrated rules, then check your file with our free browser tool.
Your photo never leaves your device. The checker on this page runs entirely inside your browser. Nothing is uploaded to Naratama or to any server.
Step 1
Which visa are you applying for?
Photo rules differ by destination and by applicant. Select your options and the specification below will update.
Step 2
Your photo specification
Digital photo
Uploaded to the online form
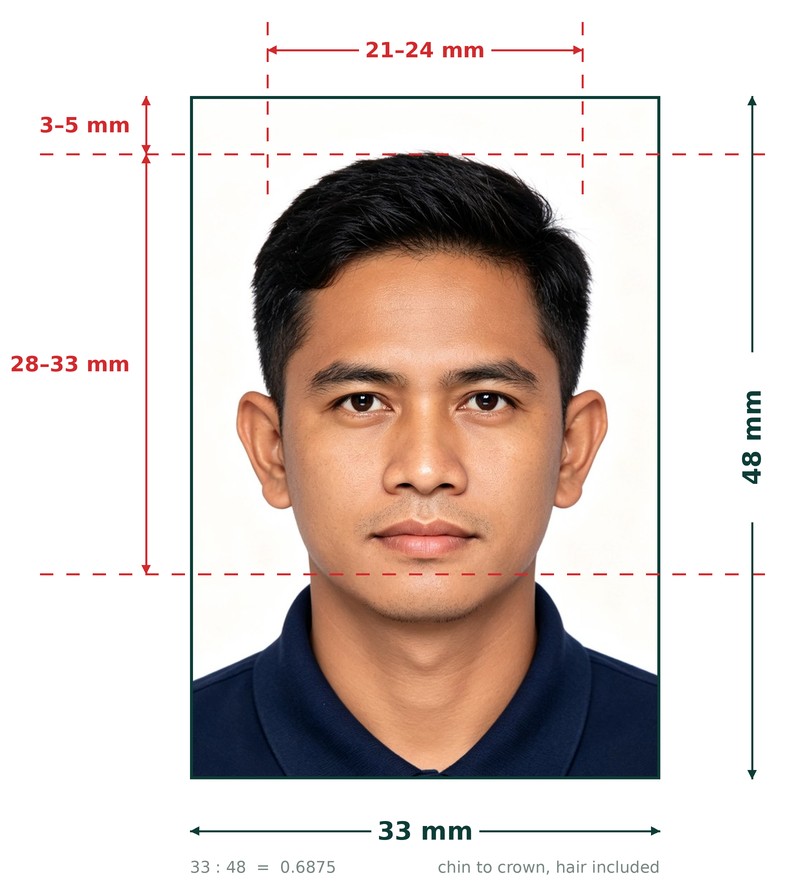
Illustration only. Measurements refer to the printed photo.
Framing
Where the head has to sit inside the frame
The frame is not just an outline — the head has to occupy a defined share of it. Use these measurements when you crop, and the checker below will show the same guide lines.
The official rules
What the authority actually requires
These points are taken from the published requirements. Every one of them is checked when your application is received.
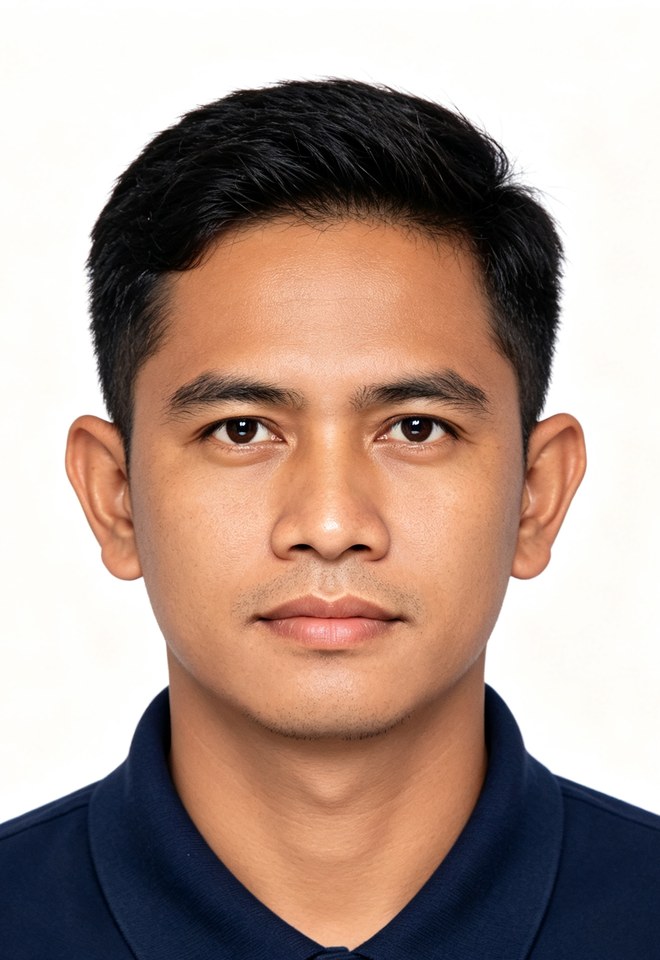
Before you submit
Twelve photos that get sent back
Compare your photo against each of these. If any one of them looks familiar, take the photo again.
Special situations
Head coverings, glasses, infants
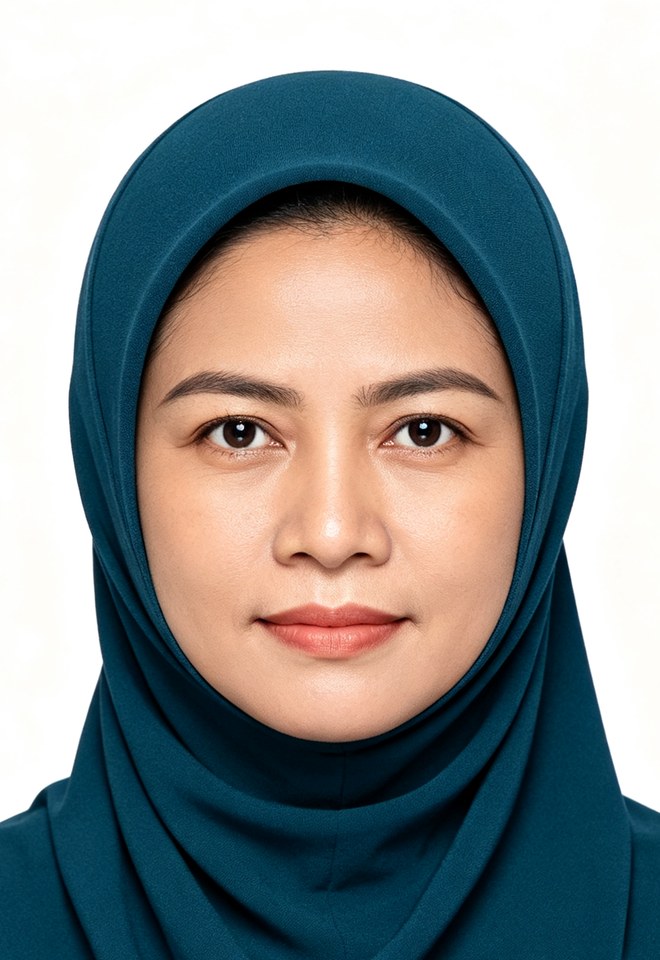
✓
Religious head covering
A head covering worn for religious reasons is accepted, provided it does not cover any part of the face. The forehead, both eyebrows, the eyes, the nose, the mouth and the chin must all be fully visible and free of shadow.
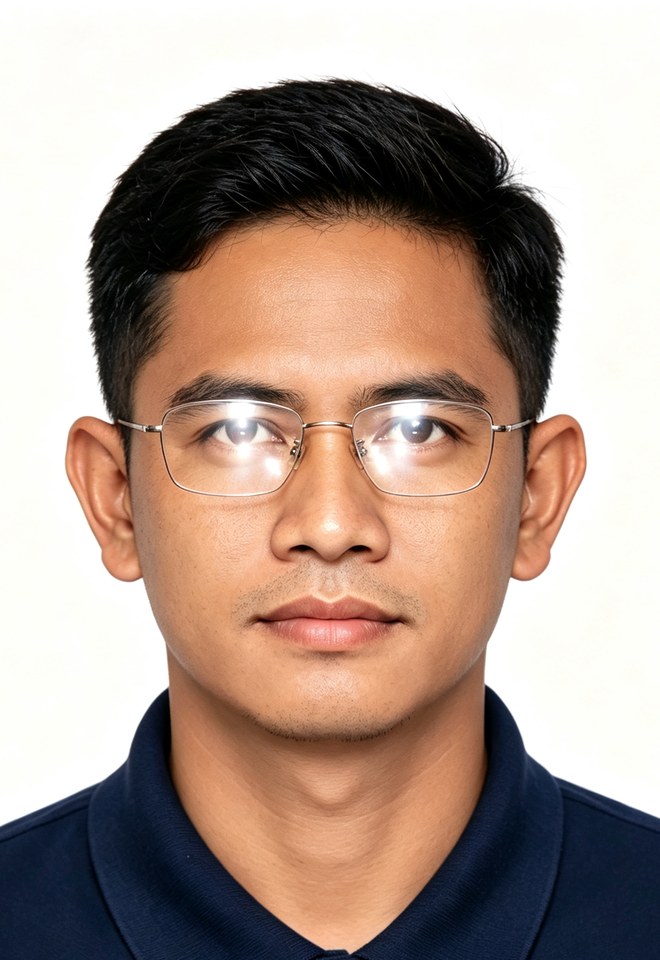
✗
Glasses
Heavy frames, tinted lenses and any reflection or glare are not accepted. If you can remove your glasses for the photo, remove them — that is the safest option and avoids a return.
i
Children and infants
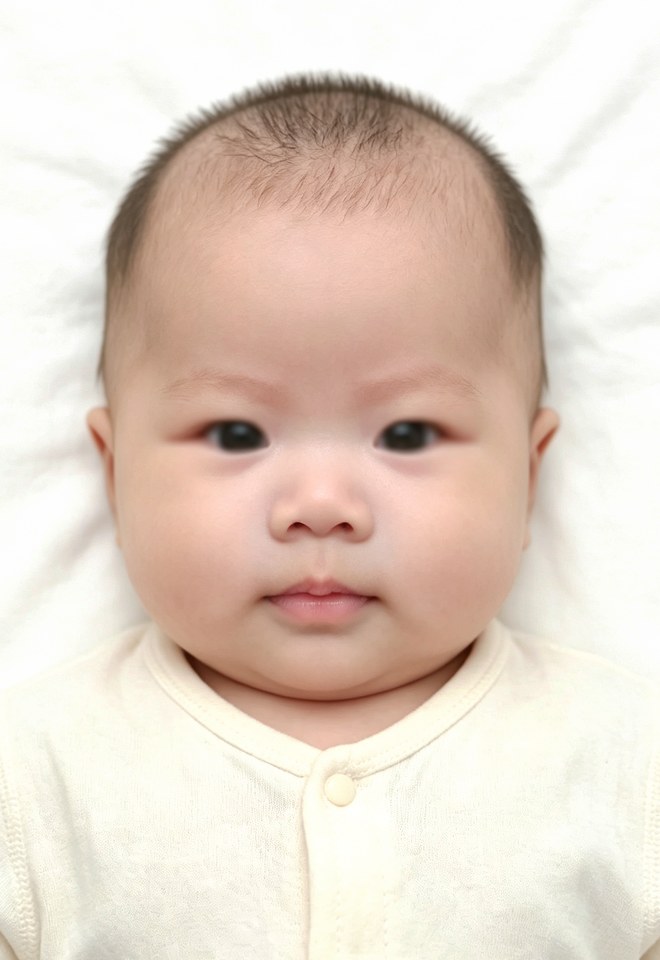
Every applicant needs their own photo, including a newborn. No other person, hand, toy or dummy may appear in the frame. Lay the child on a plain white sheet and photograph from directly above, with eyes open and mouth closed.
Taking the photo
How to shoot it properly at home
A studio is the safest route. If you are shooting it yourself, this arrangement gives you an even white background with no shadow.
 white wall
camera
eye level
white wall
camera
eye level
Step 3
Check and crop your photo
Load your photo to see whether it meets the specification. Drag to reposition, use the slider to zoom, then export a file at the correct size and weight. Everything happens inside your browser.
Choose a photo or drag it here
JPG, PNG or HEIC from your phone or camera
Drag the photo so the top of the head sits on the upper line and the chin on the lower line.
Final check
Run through this before you submit
Not sure about your photo?
Send it to us before you submit.
Our team reviews visa photos every day and can tell you in minutes whether yours will pass. We can also arrange a compliant photo for you in Jakarta.
Important note
This page is practical guidance, not an official publication and not a guarantee of acceptance. Requirements are set by the issuing authority and can change without notice. Always confirm the current specification with the relevant visa centre or with Naratama before you submit.
Based on the published photo requirements of the Chinese Visa Application Service Center (CVASC).
Page reviewed: 6 August 2026